How to Pour a Layered Cocktail
We may get commissions for purchases made through links in this post.
Layered cocktails taste good, look amazing and impress anyone who sees you successfully pouring them. They’re typically associated with sweet liqueurs, but plenty of layered cocktail recipes use rum, whiskey, vodka and other hard liquors to cut the sweetness and add some kick.
Whether your style is “cin-cin” or “chug chug,” there’s a layered cocktail out there for you. Pouring these drinks is easier than you might think: you just need to know the specific gravity of each liquor or liqueur you’re working with, and pour them in order from heaviest to lightest.
And with certain ingredient combinations, you’ll need to use a spoon so you can pour the upper layers very slowly.
How to pour a layered cocktail
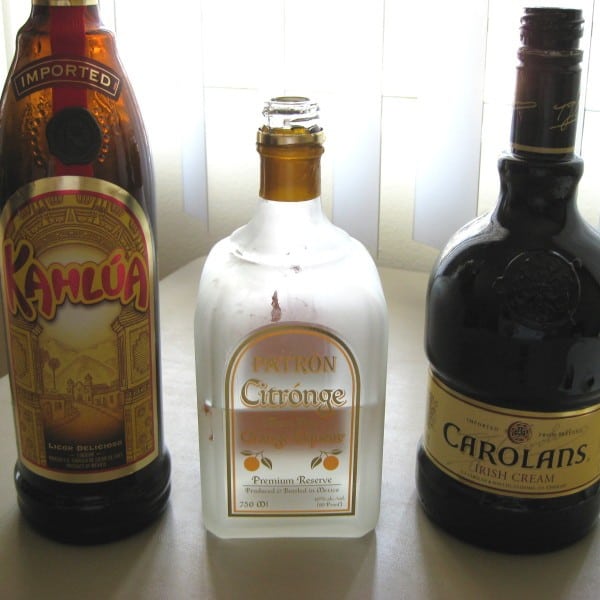
I picked a fairly tricky combination of liqueurs (Kahlua, then Patron Citronge, then Carolans Irish Cream) for this demonstration video. It took me quite a few takes to get it right because the Citronge didn’t behave as expected (more on that in a minute), but that’s part of mastering each layered cocktail.
The drink I’m making here is a B-52. Normally, the orange liqueur goes on top, but as I said above, the Patron Citronge surprised me. It was determined to mix with the Irish Cream. In fact, it wanted to mix with the Kahlua, too.
I had to pour it very slowly to float on top of the Kahlua without clouding, and then the Irish cream floated easily on top of the Citronge. (Citronge is delicious, by the way – a very clear orange note that’s not too sweet.)
It took several tries for me to figure this all out, so you always want to practice these drinks on your own before pouring to impress somebody. Change out one ingredient or even brand, and the layers may not work like you think.
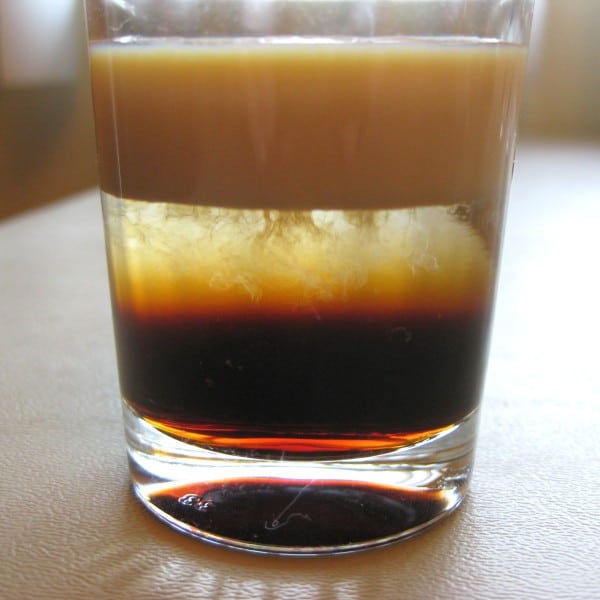
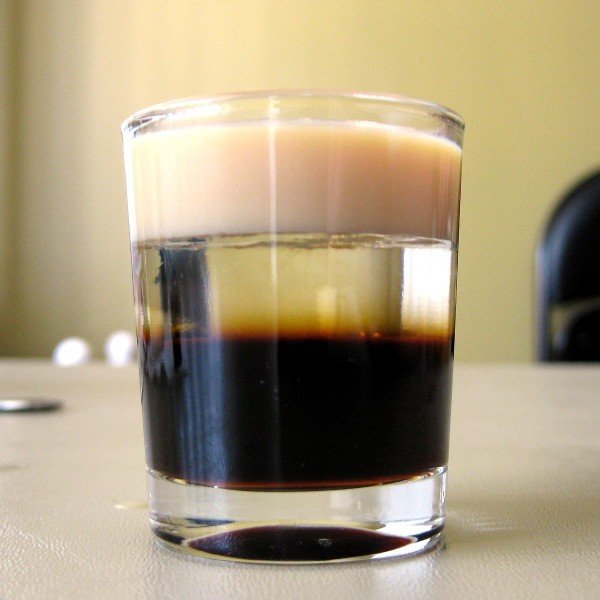
Your mistake pours needn’t go to waste, though – first of all, they often still come out looking pretty cool. Check out the clouding in the middle clear layer – it’s not how the drink is supposed to look, but unless you’re dealing with a real snob, you could just claim that’s your amazing sense of style at work:
And if your mistake pours look all kinds of wrong, just toss ’em into a flask and put the flask in the fridge. Drink the blend yourself, use it as a single ingredient in another cocktail, put it in some coffee (or other beverage), or soak sponge cake in it for a great dessert (this last one is just as simple as it sounds).
Instructions
All you really need for this is a spoon. But if your bottles are very full, cocktail pourers can help you pour them slow and steady.
Now for the step-by-step:
Step 1. Figure out the specific gravity of each of the ingredients in your drink. Recipes sometimes contain this information. You may need to research online or just experiment (as I had to with the Citronge). Sort out your ingredients in terms of heaviness, so you can pour them in from heaviest to lightest.
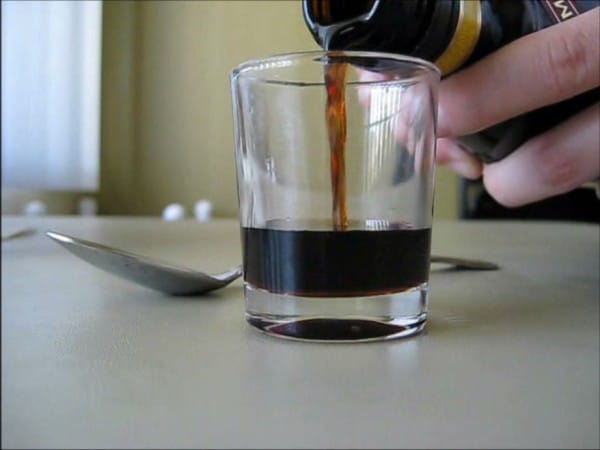
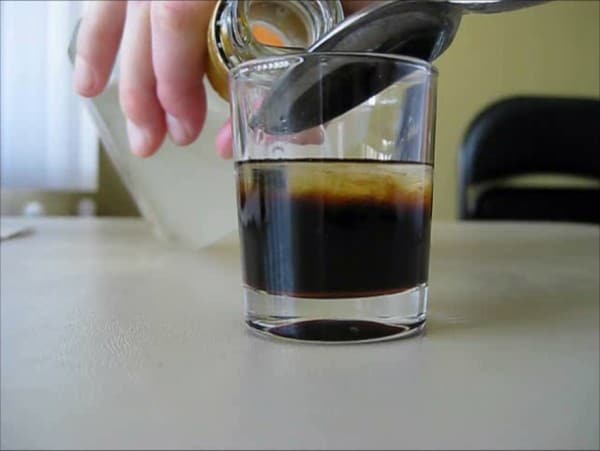
Step 2. Pour the heaviest liquor or liqueur into a shot glass or cordial glass (or whatever you prefer – the broader the glass is the less noticeable the layers will probably be). Try not to get any up on the sides – pour straight down into the center of the glass.
Step 3. Turn a spoon upside down. Place it inside the glass, with the tip of the spoon against the inside edge of the glass, above the first layer and not touching it. (Some online sources say it should be right at the top of the first layer, or even down in it a little – for me, having it above the others worked best, but it may depend on your style and/or the exact liqueurs you’re working with.)

Step 4. Pour the next heaviest liqueur as slowly as possible over the back of the spoon, moving the spoon up as the level of ingredients rises (keep it above the ingredients).
It’s easier to do this with a bottle that’s half full (or less) rather than one that’s nearly full, so you may need to pour some of the liquor or liqueur into another container.
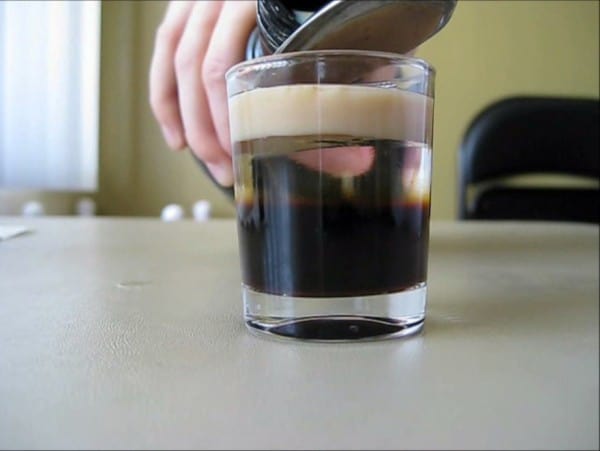
Pour from the opposite side of where you’re holding the spoon (see picture). If the two ingredients mix up a little bit, give them a few seconds to settle, and they should separate nicely.
Step 5. Repeat the process with the third layer, continuing to raise the spoon as you pour. Bring it as close as you dare to the top (you can always wipe off any spillage on the outside of the glass).
As you get closer to the rim of the glass, you can move the spoon just a few millimeters away from the edge of the glass and continue to pour over it – that gives the liqueur plenty of room to land in the glass without landing too heavily. (Besides, the further along you get in that layer, the less danger there is of disturbing the one beneath it.)
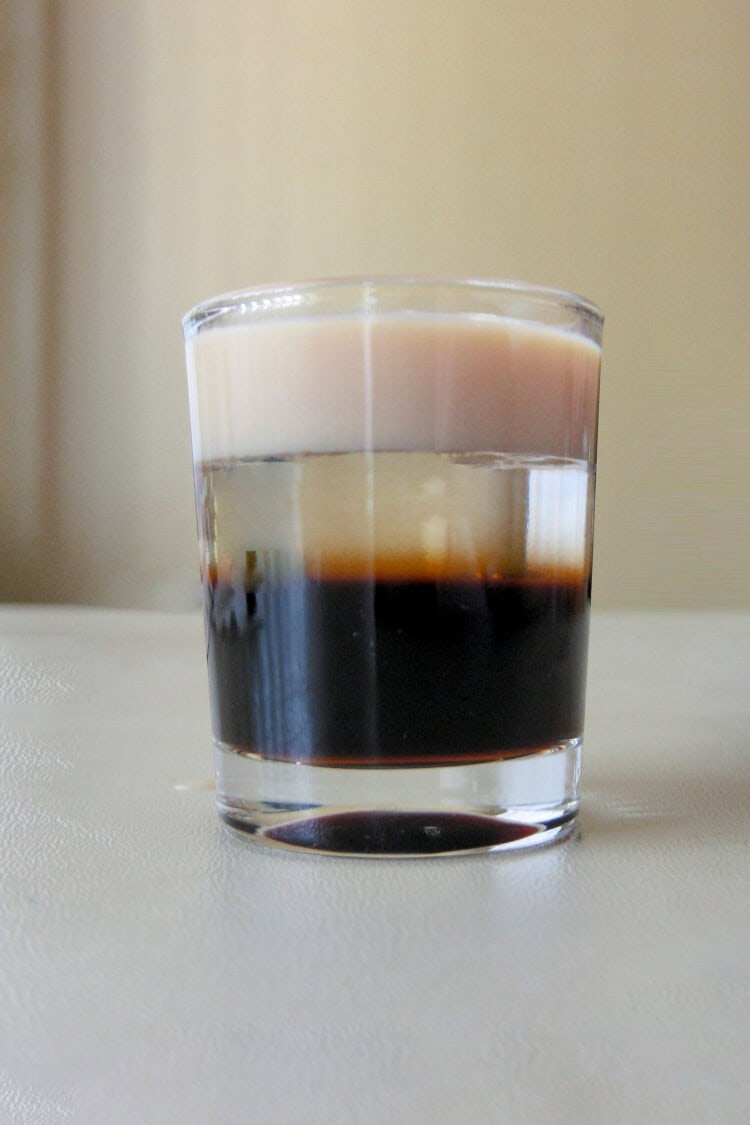
Step 6. Your finished result is three (or more, for the daring) distinct layers in different colors. Of course, this means you need to pick ingredients that aren’t too close in color if they’re next to each other (unless that’s what you want).
This is an extremely artistic approach to cocktail pouring, and there’s no end to what you can come up with.
Cheers!
Last Updated: